How to Choose a 12 Port Fiber Termination Box?
Choosing a 12 Port Fiber Termination Box is a practical network decision, not merely a cabinet-size decision. It affects splicing, protection, maintenance, and future capacity.
The FTTH Council Europe’s 2024 Market Panorama reports continued fiber expansion across European markets. Its findings show why compact, organized termination points matter in dense access networks. The Fiber Broadband Association also highlights fiber’s growing role in reliable broadband infrastructure. These trends create pressure for cleaner installations and simpler field maintenance.
A suitable 12 Port Fiber Termination Box should match the cable type, adapter interface, splice method, and installation environment. Check whether it supports SC, LC, or other connectors. Confirm its splice tray capacity. Examine sealing performance, grounding options, and bend-radius control. A box may look strong but still damage fibers through tight routing.
Small details matter.
Jim Hayes, president of The Fiber Optic Association, often reminds installers, “Fiber optics is not hard; it is just different.” That principle applies here. Technicians need practical access, clear labeling, and enough working space around every port. ITU-T recommendations, including G.657 guidance for bend-insensitive fiber, should also influence cable management choices.
Experience suggests choosing extra room when budgets allow. Twelve ports may fit today’s design, but network growth can arrive sooner than expected. I would not rely on port count alone. Weather exposure, connector density, enclosure material, and maintenance habits deserve equal attention. The perfect box does not exist. The right one balances protection, accessibility, cost, and realistic deployment conditions.
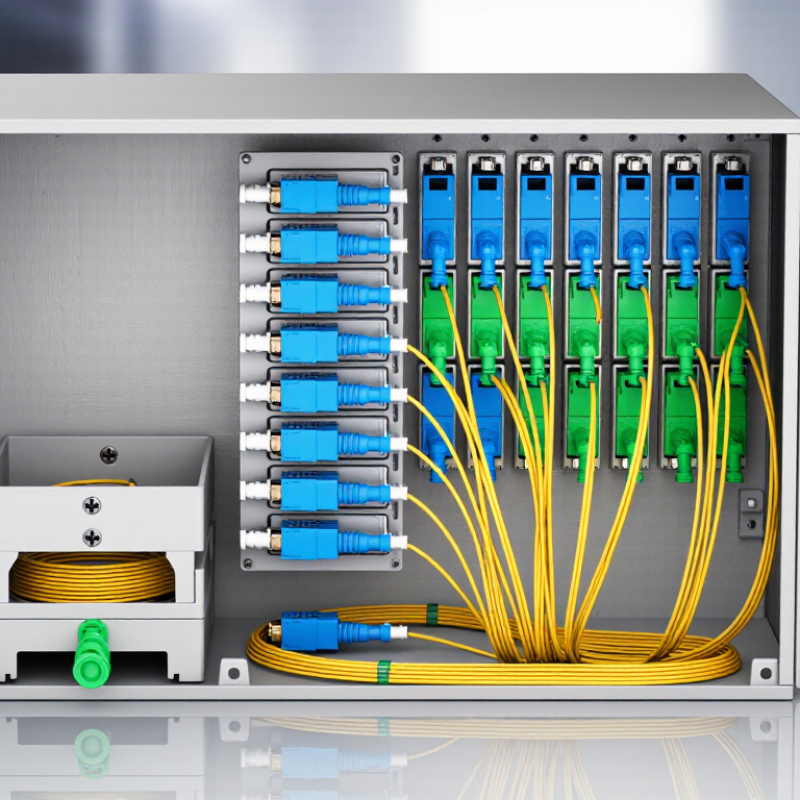
Define the Capacity and Port Requirements
Start with the fibers. A 12-port fiber termination box should match the actual number of connected fibers, not only the name on its label. Confirm whether each port uses simplex or duplex adapters. A duplex port may serve two fibers, while a simplex port serves one.
Count active links, spare fibers, and planned expansion separately. For a small office, eight active links and four spare ports may fit well. Larger installations need more flexibility. Leaving 20–30% spare capacity is practical, especially when new rooms or equipment may be added later. Leave room.
Check the internal capacity carefully. The box must accommodate incoming cable, splice sleeves, pigtails, adapters, and fiber slack without sharp bends. A crowded tray can increase insertion loss and complicate maintenance. Measure the cable diameter before choosing the enclosure. Also verify the supported fiber type, connector format, mounting method, and ingress protection rating.
A common planning mistake is counting ports but ignoring splice capacity. Twelve adapters do not guarantee space for twelve clean splices. Review the technical datasheet and installation drawing together. In real projects, routing space is often underestimated. I would rather leave unused capacity than force fibers into a tight tray. That choice costs slightly more today, but it reduces troubleshooting risks later. A final port map should identify every active, spare, and reserved connection. It may need revision after the site survey. That is normal.
How to Choose a 12 Port Fiber Termination Box? - Define the Capacity and Port Requirements
| Application Scenario | Required Port Count | Recommended Adapter Type | Fiber Capacity | Splice Capacity | Cable Entry Requirement | Suggested Protection Level | Best-Fit Box Configuration |
| Small office or floor distribution | 4–8 active ports | Duplex LC | Up to 24 fibers | 12–24 fibers | 1 incoming cable, 2–4 mm drop cables | Indoor, dust-protected | 12-port box with one splice tray |
| Building entrance distribution | 8–12 active ports | Duplex LC or SC | Up to 24 fibers | 24 fibers | 1–2 feeder cables, multiple drop cables | Indoor or sheltered outdoor | 12-port box with cable glands and splice tray |
| FTTH building distribution point | 12 active ports | SC/APC or LC/APC | 24 fibers maximum | 24 fibers | 1 feeder cable plus 12 subscriber drops | Weather-resistant enclosure | 12-port box with separate splice and patch sections |
| Industrial or utility cabinet | 6–12 active ports | Duplex LC or ruggedized connector | Up to 24 fibers | 12–24 fibers | Armored trunk cable and sealed entries | High impact and moisture resistance | Lockable metal or reinforced enclosure |
| Outdoor access point | 4–12 active ports | SC/APC or duplex LC | Up to 24 fibers | 24 fibers with spare loops | Sealed feeder and drop cable glands | At least IP65 for protected outdoor use | Sealed 12-port box with grounding provision |
Selection Checklist - Choose 12 ports when the installation requires up to twelve active fiber connections and limited future expansion.
- Confirm whether the port count refers to simplex fibers or duplex adapter positions; a duplex adapter normally serves two fibers.
- Allow spare capacity for slack storage, maintenance, and future cable additions rather than filling every position.
- Match the adapter interface and polish type to the installed equipment, such as LC, SC, UPC, or APC.
- Verify splice-tray capacity, cable-entry diameter, bend-radius space, grounding, and enclosure protection before installation.
Choose the Appropriate Fiber and Connector Type
How to Choose a 12 Port Fiber Termination Box?
Choose the Appropriate Fiber and Connector Type
Start with the network distance and transmission equipment. For links beyond a campus building, single-mode OS2 fiber is usually the safer choice. It supports long distances and leaves room for future upgrades. Multimode OM3 or OM4 can suit shorter data-center connections. However, mixing fiber categories creates avoidable troubleshooting problems.
Connector selection should match the active equipment and adapter panel. LC connectors save space, while SC connectors offer a larger body for easier handling. Check whether the system requires UPC or APC polishing. These end faces are not interchangeable in practice. APC connectors reduce reflected light, which benefits sensitive optical links. Use the same polishing type throughout each connection path.
A 12 port box needs more than twelve matching adapters. Leave enough room for splice trays, labeling, and safe cable routing. Confirm the enclosure accepts the fiber count and cable diameter before installation. Keep every bend above the manufacturer’s minimum radius. A tight loop may pass inspection today, then fail after seasonal movement.
Field testing matters. Clean each connector, inspect its end face, and measure insertion loss with calibrated equipment. An OTDR can reveal hidden splice faults or excessive reflection. I once found a weak link caused by a slightly loose adapter, not damaged fiber. That mistake reminded me to verify mechanical alignment, not just fiber type. Good records also make later repairs faster.
Evaluate Enclosure Design and Installation Method
Choosing a 12-port fiber termination box starts with enclosure design, not port count. A compact box may fit a cabinet, yet leave little room for slack management. Check the internal tray, adapter panel, grounding point, and cable entry before ordering. The fiber bend radius must remain within the cable manufacturer’s specification. Do not compress pigtails behind the cover. That mistake is common.
For indoor corridors, a lockable metal or flame-retardant polymer enclosure can protect connections from dust and accidental contact. In damp or dusty areas, verify the tested ingress rating, gasket quality, and corrosion resistance. A rating label alone is not enough. Request test documentation. Hinges should open fully, while the cover must stay clear of active fibers during inspection. Small details matter. I have seen otherwise suitable boxes fail because the cable gland was too narrow.
The installation method should match the site, not the installer’s habit. Wall mounting suits telecom rooms with accessible surfaces and short cable routes. Rack mounting works better where patching occurs inside a standard cabinet. For overhead or narrow spaces, confirm clearance for tools and future maintenance. Leave a service loop, secure cables with suitable ties, and label every port at both ends. I prefer a dry fit before drilling. It exposes mistakes early, although it adds a few minutes. After termination, inspect end faces and record insertion-loss results.
How to Choose a 12-Port Fiber Termination Box?
Evaluate enclosure design and installation method using a practical 1–5 selection score, where 5 indicates the strongest suitability for a typical 12-port fiber termination application.
Wall-mounted enclosures generally provide the best balance of accessibility, cable routing, and installation flexibility. Rack-mounted designs are efficient in data cabinets, while pole-mounted designs require stronger weather protection and mechanical fastening.
Check Protection, Cable Management, and Accessibility
How to Choose a 12 Port Fiber Termination Box?
A 12-port fiber termination box should protect delicate connections from dust, impact, moisture, and accidental pulling. In field installations, a strong enclosure prevents small problems from becoming signal failures. Check the material, sealing method, and available protection rating. A flame-retardant housing is also important for indoor safety. If the box supports grounding, verify that the connection point is easy to reach. Do not assume every enclosure offers the same protection.
Cable management deserves equal attention. Look for splice trays, bend-radius guides, and secure entry points. Fibers should curve gently, never fold sharply behind the cover. Clear labeling reduces mistakes during testing or repairs. Leave enough space for cable slack. Too much slack becomes messy, though. I have seen installers choose a compact box and regret it later. The ports fit, but the working space does not. A 12-port design should allow neat routing without forcing fibers into place.
Tips: Open the box before buying, if possible. Test the door with gloved hands. Confirm that adapters, trays, and glands match your cable type. Choose a layout that keeps every port visible. Accessibility matters during maintenance, especially in crowded cabinets. A box that looks tidy at installation may become difficult after future upgrades. Keep that possibility in mind.
Compare Materials, Standards, and Long-Term Value
How to Choose a 12 Port Fiber Termination Box?
A 12 port fiber termination box should match the installation environment, not just the port count. For indoor cabinets, flame-retardant ABS or polycarbonate can reduce weight and simplify handling. Outdoor sites often need coated steel or UV-stabilized polycarbonate. Check the IP rating, gasket quality, and cable-entry seals before buying. A cheap enclosure may crack around its hinges after repeated maintenance.
Standards provide useful evidence, but they do not replace inspection. Confirm connector and adapter compatibility with applicable IEC interface requirements, such as IEC 61754. Check whether the enclosure’s ingress protection was tested under IEC 60529. Fiber performance should also align with relevant installation and inspection procedures, including IEC 61300 where applicable. Local fire, grounding, and telecom regulations still matter. I once measured only the tray width and missed the bend-radius requirement. That mistake created unnecessary fiber stress.
Think beyond today’s twelve ports. Leave room for splice sleeves, labeling, slack storage, and gloved access. A strong box protects fibers during cleaning, reconnection, and accidental cable movement. Look for secure latches, corrosion-resistant hardware, and a reliable grounding point when metal is used. Replacement trays and adapters should remain available for years, not months. The most expensive choice is often the box that needs early replacement. Long-term value depends on fewer service visits, clearer identification, and stable optical performance. That is worth checking carefully.

