ClickCease

How to Fix Cars with Top China Auto Parts?

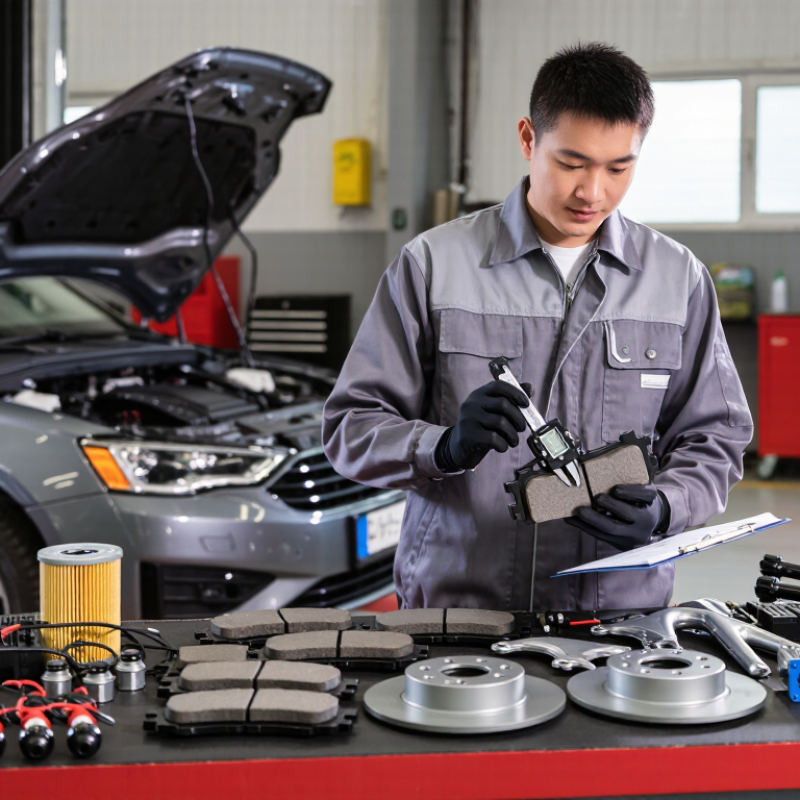
When you need to fix cars, the right replacement part can matter more than the lowest price. China’s automotive parts industry offers brake pads, sensors, filters, suspension components, body panels, and electrical modules for many vehicle brands. However, quality varies between suppliers. A professional repair process begins with accurate identification, not a rushed purchase. Check the vehicle identification number, engine code, production year, dimensions, connector shape, and manufacturer specifications. A part that looks identical may still fail to fit.

ChrisFix, a well-known automotive repair educator, often says, “The best way to fix your car is to learn how it works.” That idea applies strongly when choosing top China auto parts. A skilled technician should inspect the damaged component, compare technical data, and verify testing or quality documentation. For example, a brake pad should match the correct caliper design and operating temperature. A sensor should provide compatible readings, not merely share the same plug.

Supplier reputation matters. So do traceability, warranty terms, material information, and clear installation instructions. Independent reviews can help, but they should not replace professional inspection. Even experienced mechanics can overlook a small connector difference or an incorrect thread size. Mistakes happen.

The practical goal is simple: restore safe, dependable performance. Choose parts based on fit, evidence, and application. Saving money is useful, but reliability comes first. A careful repair may take longer. It usually costs less than repeating the same job.

How to Fix Cars with Top China Auto Parts?

Identifying the Right China Auto Parts for Your Car

Choosing the right China auto parts starts with accurate vehicle information. Record the vehicle identification number, model year, engine type, and production date. Small differences can change fitment, even within one model line. Measure mounting holes, connector shapes, and component dimensions when possible. A photo helps, but it should not replace measurements.

I once ordered a suspension component using only the vehicle model. The part looked correct, yet its bushing diameter was different. That mistake caused delays and extra shipping costs. Now, I compare the original part number with the supplier’s fitment chart. I also request material details, testing records, and installation instructions. Clear documentation matters more than attractive prices. Ask whether the part meets recognized safety and quality requirements. Check the warranty, return conditions, and traceable contact information before purchasing.

A qualified mechanic can confirm difficult choices, especially for braking, steering, electrical, and engine components. These systems need precise compatibility. Inspect the package for cracks, corrosion, missing seals, or damaged connectors before installation. Keep invoices and photographs for your maintenance records. Do not force a part into place. Stop if the alignment feels wrong. Some listings may contain incomplete information, and I have overlooked details before. A careful second review is worth the extra few minutes. Repair decisions should consider road conditions, vehicle use, and the part’s expected service life.

Checking Part Quality, Compatibility, and Safety Standards

Fixing a car with top China auto parts starts with careful checking, not a low price. I usually compare the part number, vehicle year, engine type, and VIN before ordering. A small mismatch can cause warning lights, poor handling, or repeated repairs. Inspect the packaging, casting, wiring, seals, and fasteners when the part arrives. Uneven surfaces or brittle rubber deserve questions.

Quality is more than appearance. Ask for material details, inspection records, and safety testing information. Check whether the part follows recognized automotive standards and local vehicle requirements. For braking, steering, suspension, and fuel components, professional inspection is especially important. I once trusted a part because it looked identical to the original. Its mounting holes were slightly wrong. That mistake cost extra time and taught me to measure everything.

Tips: Compare dimensions with the removed part. Test electrical connectors before final installation. Keep invoices and product records. If instructions are unclear, stop and consult a qualified technician. Do not force a fitting part. A temporary shortcut can become a safety problem. After installation, check fluid leaks, unusual noise, warning lights, and fastener torque. Take a short, controlled test drive away from heavy traffic. Recheck the installation afterward, because some faults appear only after movement or heat.

How to Fix Cars with Top China Auto Parts? - Checking Part Quality, Compatibility, and Safety Standards
Part Category Key Quality Checks Compatibility Verification Safety or Technical Reference Recommended Evidence Typical Failure Risk Installation Decision
Brake Pads Check friction material consistency, backing-plate condition, bonding quality, wear indicators, surface cracks, and abnormal contamination. Match vehicle application, axle position, pad shape, dimensions, caliper type, and the required brake-system specification. Review applicable replacement-brake requirements, such as UNECE Regulation No. 90 or the relevant national vehicle regulations. FMVSS 135 may apply to the vehicle braking system in the United States. Material and performance test reports, batch traceability, dimensional inspection, and installation instructions. Critical Do not install if the part number, dimensions, friction material, or certification evidence cannot be confirmed.
Brake Rotors Inspect disc thickness, lateral runout, friction-surface finish, ventilation channels, casting quality, corrosion, and mounting-hole accuracy. Confirm rotor diameter, thickness, center bore, bolt pattern, offset, wheel clearance, and compatibility with the specified brake caliper. Verify compliance with the vehicle manufacturer’s service limits and applicable national braking regulations. Dimensional report, runout measurement, hardness or material report, and batch identification. Critical Reject any rotor outside the vehicle service limit or showing cracks, severe corrosion, distortion, or incorrect mounting dimensions.
Engine Air Filters Check filter-media uniformity, pleat spacing, frame rigidity, sealing gasket quality, adhesive coverage, and resistance to deformation. Match the housing dimensions, sealing profile, airflow direction, and the vehicle’s engine application or cross-reference number. ISO 5011 can be used as a reference for testing air-cleaner performance and restriction. The vehicle manufacturer’s maintenance specification remains essential. Filtration-efficiency test, pressure-drop data, dimensional inspection, and clean-room or contamination-control records where available. High Do not use a filter with a loose seal, damaged media, incorrect dimensions, or excessive airflow restriction.
Oil Filters Verify filter-media construction, anti-drainback valve operation where required, bypass-valve function, thread accuracy, gasket quality, and housing strength. Confirm thread size, gasket diameter, filter height, bypass-valve specification, and engine-specific application. Use the engine service specification for filtration, pressure, capacity, and valve requirements; there is no single universal oil-filter specification for every vehicle. Pressure and flow test results, material information, dimensional report, and batch traceability. High Reject filters with damaged threads, distorted gaskets, leaking seams, or unverified pressure-valve specifications.
Control Arms Inspect casting or forging quality, welds, ball-joint seating, bushing hardness, corrosion protection, and dimensional accuracy. Match mounting points, ball-joint type, bushing position, suspension geometry, left-or-right orientation, and vehicle generation. Follow the vehicle manufacturer’s suspension geometry and service requirements. Safety-related suspension components should be assessed against applicable local regulations. Material certificate, dimensional inspection, fatigue or durability test results, corrosion-resistance information, and installation torque data. Critical Do not install a component with cracks, deformed mounting points, loose joints, incorrect bushings, or missing torque specifications.
Shock Absorbers Check oil leakage, rod straightness, seal condition, piston-rod finish, mounting-eye dimensions, and compression and rebound behavior. Confirm vehicle application, axle position, extended and compressed lengths, mounting style, and electronic-control requirements where applicable. Validate performance against the vehicle manufacturer’s suspension specification and applicable road-vehicle safety requirements. Damping-force test curve, dimensional report, leakage test, endurance test, and fitting instructions. High Replace in axle pairs when required by the service procedure, and reject any unit with leakage, bent rods, damaged mounts, or unexplained damping differences.
Wheel Bearings Check bearing noise, rotation smoothness, seal integrity, preload, surface finish, magnetic encoder condition, and contamination control. Match bearing dimensions, load rating, hub design, sensor type, encoder orientation, and vehicle anti-lock braking system requirements. Verify compatibility with the vehicle’s wheel-speed sensing system and follow the manufacturer’s bearing installation and preload procedure. Load and endurance test results, dimensional report, seal inspection, sensor verification, and traceability records. Critical Do not install if the bearing is noisy, contaminated, incorrectly oriented, or unable to provide the required wheel-speed signal.
Headlamps and Signal Lamps Inspect lens clarity, beam alignment, housing sealing, connector quality, heat resistance, light-source compatibility, and moisture protection. Confirm mounting points, connector type, left-hand or right-hand traffic configuration, bulb or LED specification, and vehicle communication requirements. Applicable references may include FMVSS 108 in the United States and relevant UNECE lighting regulations in other markets, depending on the lamp function and jurisdiction. Photometric test report, beam-pattern verification, ingress-protection information, electrical test results, and regulatory marking where required. Critical Do not use a lamp with an incorrect beam pattern, inadequate sealing, incompatible electrical control, or missing required regulatory approval.
Seat Belt Assemblies Check webbing condition, stitching, buckle operation, retractor locking, anchorage hardware, pretensioner compatibility, and warning-label information. Match seating position, belt length, mounting geometry, buckle type, pretensioner system, and vehicle restraint-control system. Applicable references may include FMVSS 209 and FMVSS 210 in the United States or UNECE Regulation No. 16 in markets using UNECE vehicle regulations. Restraint-system test records, webbing and buckle inspection, anchorage data, production-date traceability, and fitting instructions. Critical Never install a belt with frayed webbing, a damaged buckle, a failed retractor, deployed pretensioner, or uncertain restraint-system compatibility.
Radiators Inspect core fin condition, tube-to-header joints, tank sealing, mounting brackets, pressure resistance, and coolant compatibility. Match core dimensions, inlet and outlet positions, transmission-cooler connections, fan-shroud clearance, and vehicle cooling-system layout. Follow the engine manufacturer’s cooling-system pressure, temperature, coolant, and corrosion-protection requirements. Pressure-leak test, thermal performance data, material information, dimensional report, and coolant compatibility statement. High Reject any radiator with leaks, blocked passages, distorted mounting points, incompatible materials, or insufficient pressure-test evidence.
Electrical Sensors Check connector locking, terminal quality, housing sealing, resistance or voltage range, calibration stability, and protection against vibration and moisture. Match sensor type, connector pinout, signal protocol, operating range, mounting position, and vehicle control-unit requirements. ISO 16750 may be relevant for environmental testing of electrical and electronic equipment in road vehicles; the vehicle control system’s technical specification is also required. Calibration report, electrical characteristic curve, environmental test results, connector inspection, and error-code compatibility information. High Do not install a sensor with an uncertain pinout, unstable output, damaged connector, missing calibration data, or incompatible control-unit signal.

Preparing Tools and Removing the Damaged Component

Repairing a vehicle with quality auto parts begins with careful preparation. Before touching the damaged component, park on level ground and engage the parking brake. Let hot parts cool completely. I keep sockets, screwdrivers, pliers, a torque wrench, gloves, a flashlight, and a magnetic tray nearby. The correct tools prevent rounded bolts and accidental damage. Check the service manual for lifting points, wiring locations, and torque specifications.

Tips: Disconnect the battery when electrical parts are involved. Label every connector. Take clear photos before removal. Place removed bolts in separate containers. Never rely on a jack alone; use approved stands. A small mistake here can become expensive later.

Inspect the replacement part beside the old one before installation. Compare mounting holes, connector shapes, seals, and overall dimensions. Remove dirt around the damaged component before loosening fasteners. This keeps debris away from open lines and sensitive surfaces. Penetrating fluid may help with rusty bolts, but allow it time to work. Do not force a connector. Release its locking tab first.

In my experience, rushing removal causes more trouble than the original failure. I once missed a hidden clip and damaged a wiring sleeve. That delay was avoidable. If a bolt spins without loosening, support the opposite nut or stop and investigate. After removal, inspect nearby brackets, hoses, and wiring for secondary damage. Record anything uncertain before fitting the new component.

Installing and Testing the Replacement Auto Part

How to Fix Cars with Top China Auto Parts?

Installing and Testing the Replacement Auto Part

A reliable repair begins with exact identification, not price alone. Match the vehicle year, engine code, connector shape, and original part number. I once trusted a similar-looking sensor and wasted an afternoon correcting the mistake. Remove the battery connection when required, then photograph each connector before removal. Clean rust and debris from the mounting surface. Follow the manufacturer’s torque specification with a calibrated wrench. A loose fastener can create vibration, noise, or an unsafe failure.

Tips: Compare the replacement part beside the old one. Check pins, seals, bolt holes, and wire length. Do not force a connector. After installation, scan for fault codes and clear them only after recording the original data. Start the engine and watch warning lights, idle speed, fluid leaks, and unusual sounds. Test the vehicle in a controlled area before normal driving. A short inspection can prevent a long repair.

Testing should prove function, not merely appearance. The 2024 J.D. Power Initial Quality Study reported 190 problems per 100 vehicles, covering many vehicle systems. That figure is not proof that replacement parts caused failures, but it shows why verification matters. NHTSA reported 40,901 U.S. traffic fatalities in 2023, so safety-related components deserve extra care. For brakes, steering, suspension, and lighting, compare measured performance with service-manual limits. My own weak point is rushing the final inspection. A second check often finds the small mistake.

Maintaining China Auto Parts for Reliable Vehicle Performance

How to Fix Cars with Top China Auto Parts?

Maintaining China auto parts requires careful matching, not guesswork. In my workshop experience, well-made components can deliver reliable vehicle performance. Check dimensions, connector shapes, material quality, and compatibility before installation. Compare the part with the original component. Look closely at seals, threads, welds, and molded edges. Small flaws can become expensive problems later. Cheap does not always mean weak. High price does not guarantee quality.

Use the vehicle service manual for torque values and maintenance intervals. A torque wrench matters, especially for suspension and braking components. Clean mounting surfaces before fitting new parts. Dirt can create uneven pressure and early wear. Electrical connectors should remain dry and firmly locked. Replace damaged clips instead of forcing them. Do not rush this step.

Keep records of installation dates, mileage, and unusual sounds. Inspect filters, belts, hoses, and bushings during routine service. A short road test can reveal vibration, pulling, or delayed braking. Stop driving if a safety-related symptom appears. I once trusted a visually perfect component without checking its hardness rating. It failed sooner than expected. That mistake reminded me to verify specifications and supplier documentation every time. Some parts still need closer observation after installation. Monitor them again after several hundred kilometers.